Under Construction
04.12 The Sample Window
The Sample Window opens up and shows the waveform of the selected sample,
everytime the Atari got hold of the raw sample data - either from disk or
actually retrieved from the Akai. The Sample Window mainly serves as a
graphical editor for Sample Loops.
By default the Atari screen will look something like this ...
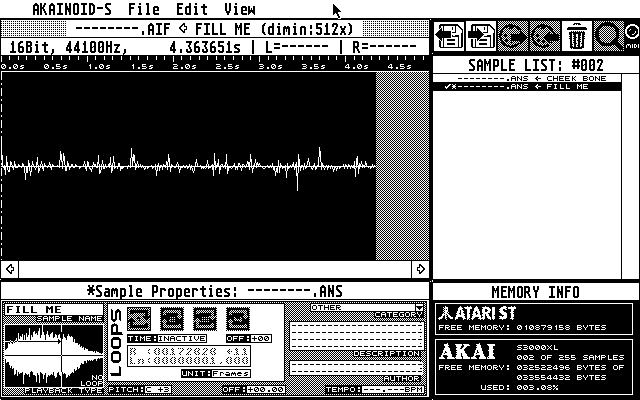
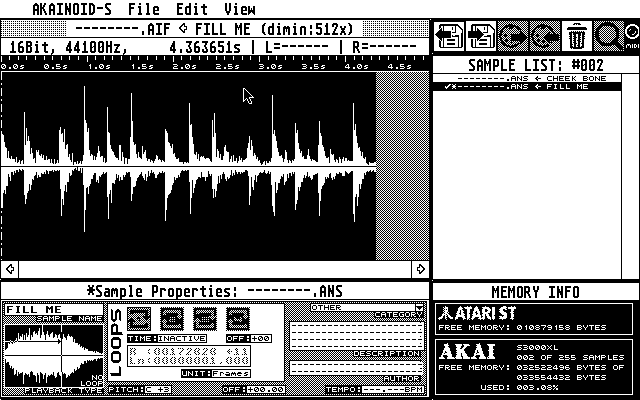
... which is admittedly a very bad aproximation of what the graph should really look like, but it's drawn very fast. A much better better graph is drawn, when you choose "Minimum->Maximum" in the View section of the pull-down menu. You will notice how after selecting this View, that the Atari is "thinking" for a couple of seconds before the sample is drawn. This is to avoid further computing time when the sample has to be drawn again:
You may span up loops using the mouse. If no loop has been spanned up yet, click into the
sample window to define the right locator or loop point (at:).
Click this locator now visible as a vertical line after the mouse pointer has turned into
a pointing hand and keep the mouse button pressed to span up
the loop by moving the mouse leftwards. Once you release the mouse button,
the new loop data is being transferred to the Akai.
A spanned up loop can still be modified by dragging its right (loop point) or
left (loop length) locator.
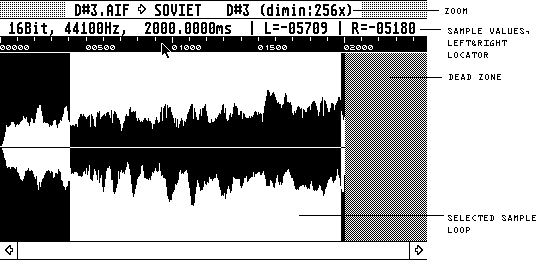
While changing the position of the left (L=) and right (R=) locator the corresponding
sample values are displayed to the right of the sample window's info bar.
Press [Esc] in order to deselect the loop spanned up or choose the
corresponding menu item from the Edit menu.
You can zoom in and out the sample and scroll through it from start to finish. Use the corresponding menu items in the View menu or [Num +] and [Num -] to do so. As the loop usually is demagnified, the diminuition factor is displayed in the window title (actually the number of sample frames per pixel).
NEW:
I reprogrammed zooming so the diminuition factor is always exponents of 2 instead of weird floating point values. This leads to a greyed out area behind the actual sample I call the Dead Zone. It really is dead, there's no point in clicking into it!
There is an alternative view displayed in the sample window, which is more precise but the downside of the view being the time it takes until the waveform is completely displayed.
You can make the selected loop span up the entire sample by choosing "Select
All" from the Edit menu or pressing [Ctrl]+[A].
Given a certain Loop Point (at) you can max out the loop length by choosing
"Max Out Loop Length" from the pull-down menu or by pressing [Ctrl]+[M].